I was recently involved in teaching my first ever knitting workshop as part of a course about different sorts of creativity offered by the church I am part of …….if you are interested, here are my handouts!
Knitting – the basics
If you, like many people look at hand knitted or crocheted items and think “wow…I could never do that” You are wrong! With a bit of practice anyone can do it! Hopefully this session will show you how!

Before beginning to knit you need to get your wool onto your needles. This is known as casting on. There are lots of different ways of doing this – to see a demonstration of the method we learned in the workshop go to: http://www.youtube.com/watch?v=3uw-nUvGrBY
There are 2 basic stitches to learn, knit stitch and purl stitch, which are the opposite of each other.· To start your napkin ring cast on 7 stitches
There are 2 basic stitches to learn, knit stitch and purl stitch, which are the opposite of each other.

 <---------- If you knit one row and purl the next you are producing your knitting in stocking stitch (lots of rows of Vs on one side, and lots of wavy shapes on the other side of your work).
· We’ll make our first napkin ring in garter stitch and see how we go!
Knit stitch:

Start with your wool at the back of your work and with your right hand needle go through the front of the stitch on the left needle from left to right then take the wool around the back and between the needles , tilt the right needle down drawing the wool tail through the stitch on your left needle (you now have a new loop on your right needle), and pull the stitch off your left needle.
 To see a demonstration of the method we learned in the workshop go to: http://www.youtube.com/watch?v=3uw-nUvGrBY. For a good set of drawings go to: http://www.learn2knit.co.uk/
Casting off: when you have finished your item you need to take your work off the needles and create a finished top edge. This is known as casting off. To do this, you need to knit as normal for 2 stitches, then pass the first stitch over the top of the second, and off the needle. Knit the next stitch, and then pass the second stitch over it and off the needle and so on until all of your stitches but one are off thneedle. Cut your wool leaving a c.20cm tail and thread the end through the stitch still on the needle, pull the stitch off the needle and you are done!
Continuing with your napkin ring.......
· Knit 16 rows
Making the button hole for your napkin ring:
· On the 17th row knit 3 stitches. Cast off 1 stitch (knit 1, then pass previous stitch over it and off the needles). Knit 3 stitches.
· On the 18th row knit 3 stitches. Cast on 1 stitch. Knit 3 stitches
· Row 19: knit all stitches
· Row 20: cast off all stitches

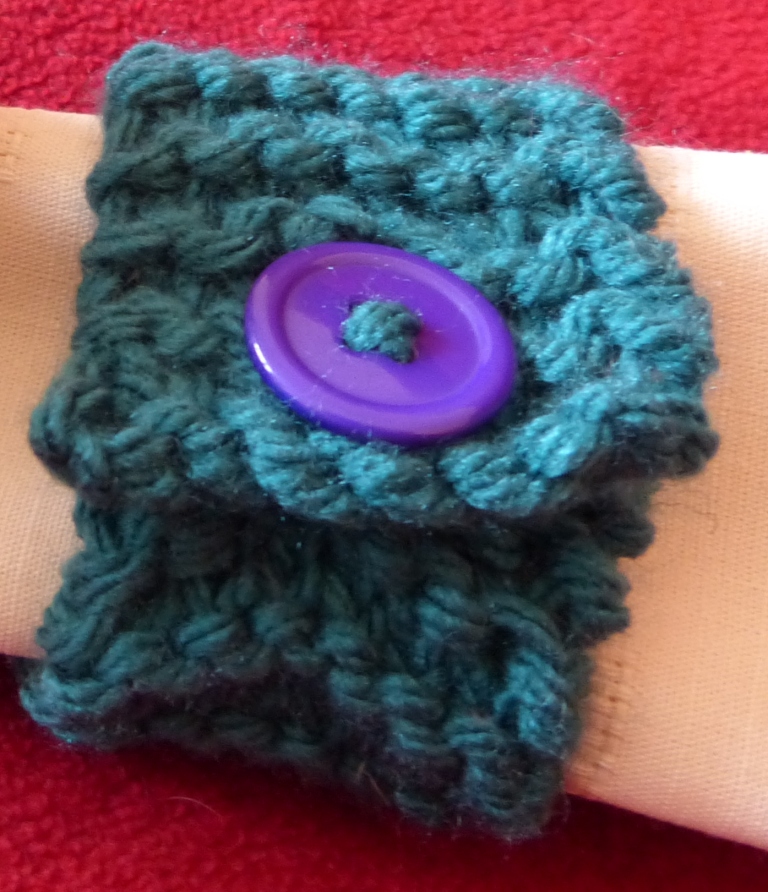
· Decorate your napkin ring with buttons, flowers, etc. The examples used herehhave been taken from : http://faeryfaysflowersknits.blogspot.com/p/pretty-crochet-flowers.html and http://s6girl.blogspot.com/2012/02/flower-brooch.html
· Sew in the loose ends of wool with a darning needle
Et voila! - C’est fini :c)


Purl stitch: a purl stitch is the exact opposite of a knit stitch, instead of starting with your wool at the back of your work and going through the front of the stitch on the left needle from left to right [1a] then taking the wool around the back and between the needles [2a] (knitting), with a purl stitch you start with your wool at the front, and put your right hand needle through the front of the stitch on the left needle from the right [1b] and bring the wool between the needles around the front [2b]. To see a demonstration of the method we learned in the workshop go to: http://www.youtube.com/watch?v=nD5fxWP75yI. For a good set of drawings see: http://www.learn2knit.co.uk/
Now let’s have a go at doing a napkin ring in stocking stitch!
· Cast on 7 stitches
· Knit one row, purl one row for 16 rows (you should always be knitting on the side with the V shaped stitches [right side], and purling on the side with the wavy lines [wrong side])
Making the button hole for your napkin ring:
· On the 17th row knit 3 stitches. Cast off 1 stitch (knit 1, then pass previous stitch over it and off the needles). Knit 3 stitches.
· On the 18th row purl 3 stitches. Cast on 1 stitch. purl 3 stitches
· Row 19: knit all stitches
· Row 20: cast off all stitches in purl
· Decorate your napkin ring with buttons, flowers, etc.
 Ribbing: Another common technique which uses both knitting and purling is ribbing. This is usually used for cuffs and collars and has a stretchier finish than stocking or garter stitch. To produce ribbing you knit and purl stitches on the same row alternately. As long as you stay in pattern in every row (i.e. knit the knit stitches [Vs] and purl the purl stitches [horizontal bars making up waves]) you should get linear rows of ribbing. Make sure you remember to flip the wool from front to back of your work each time you change stitch. This can be done with any combination of stitch counts - e.g.: (k1, p1) or (k2, p2), or (k3, p1).
You could try making yet another napkin ring using this technique – you’ll soon have a set!
No comments:
Post a Comment